HADARS Greenhouse Thermometer.
 Parts Required:-
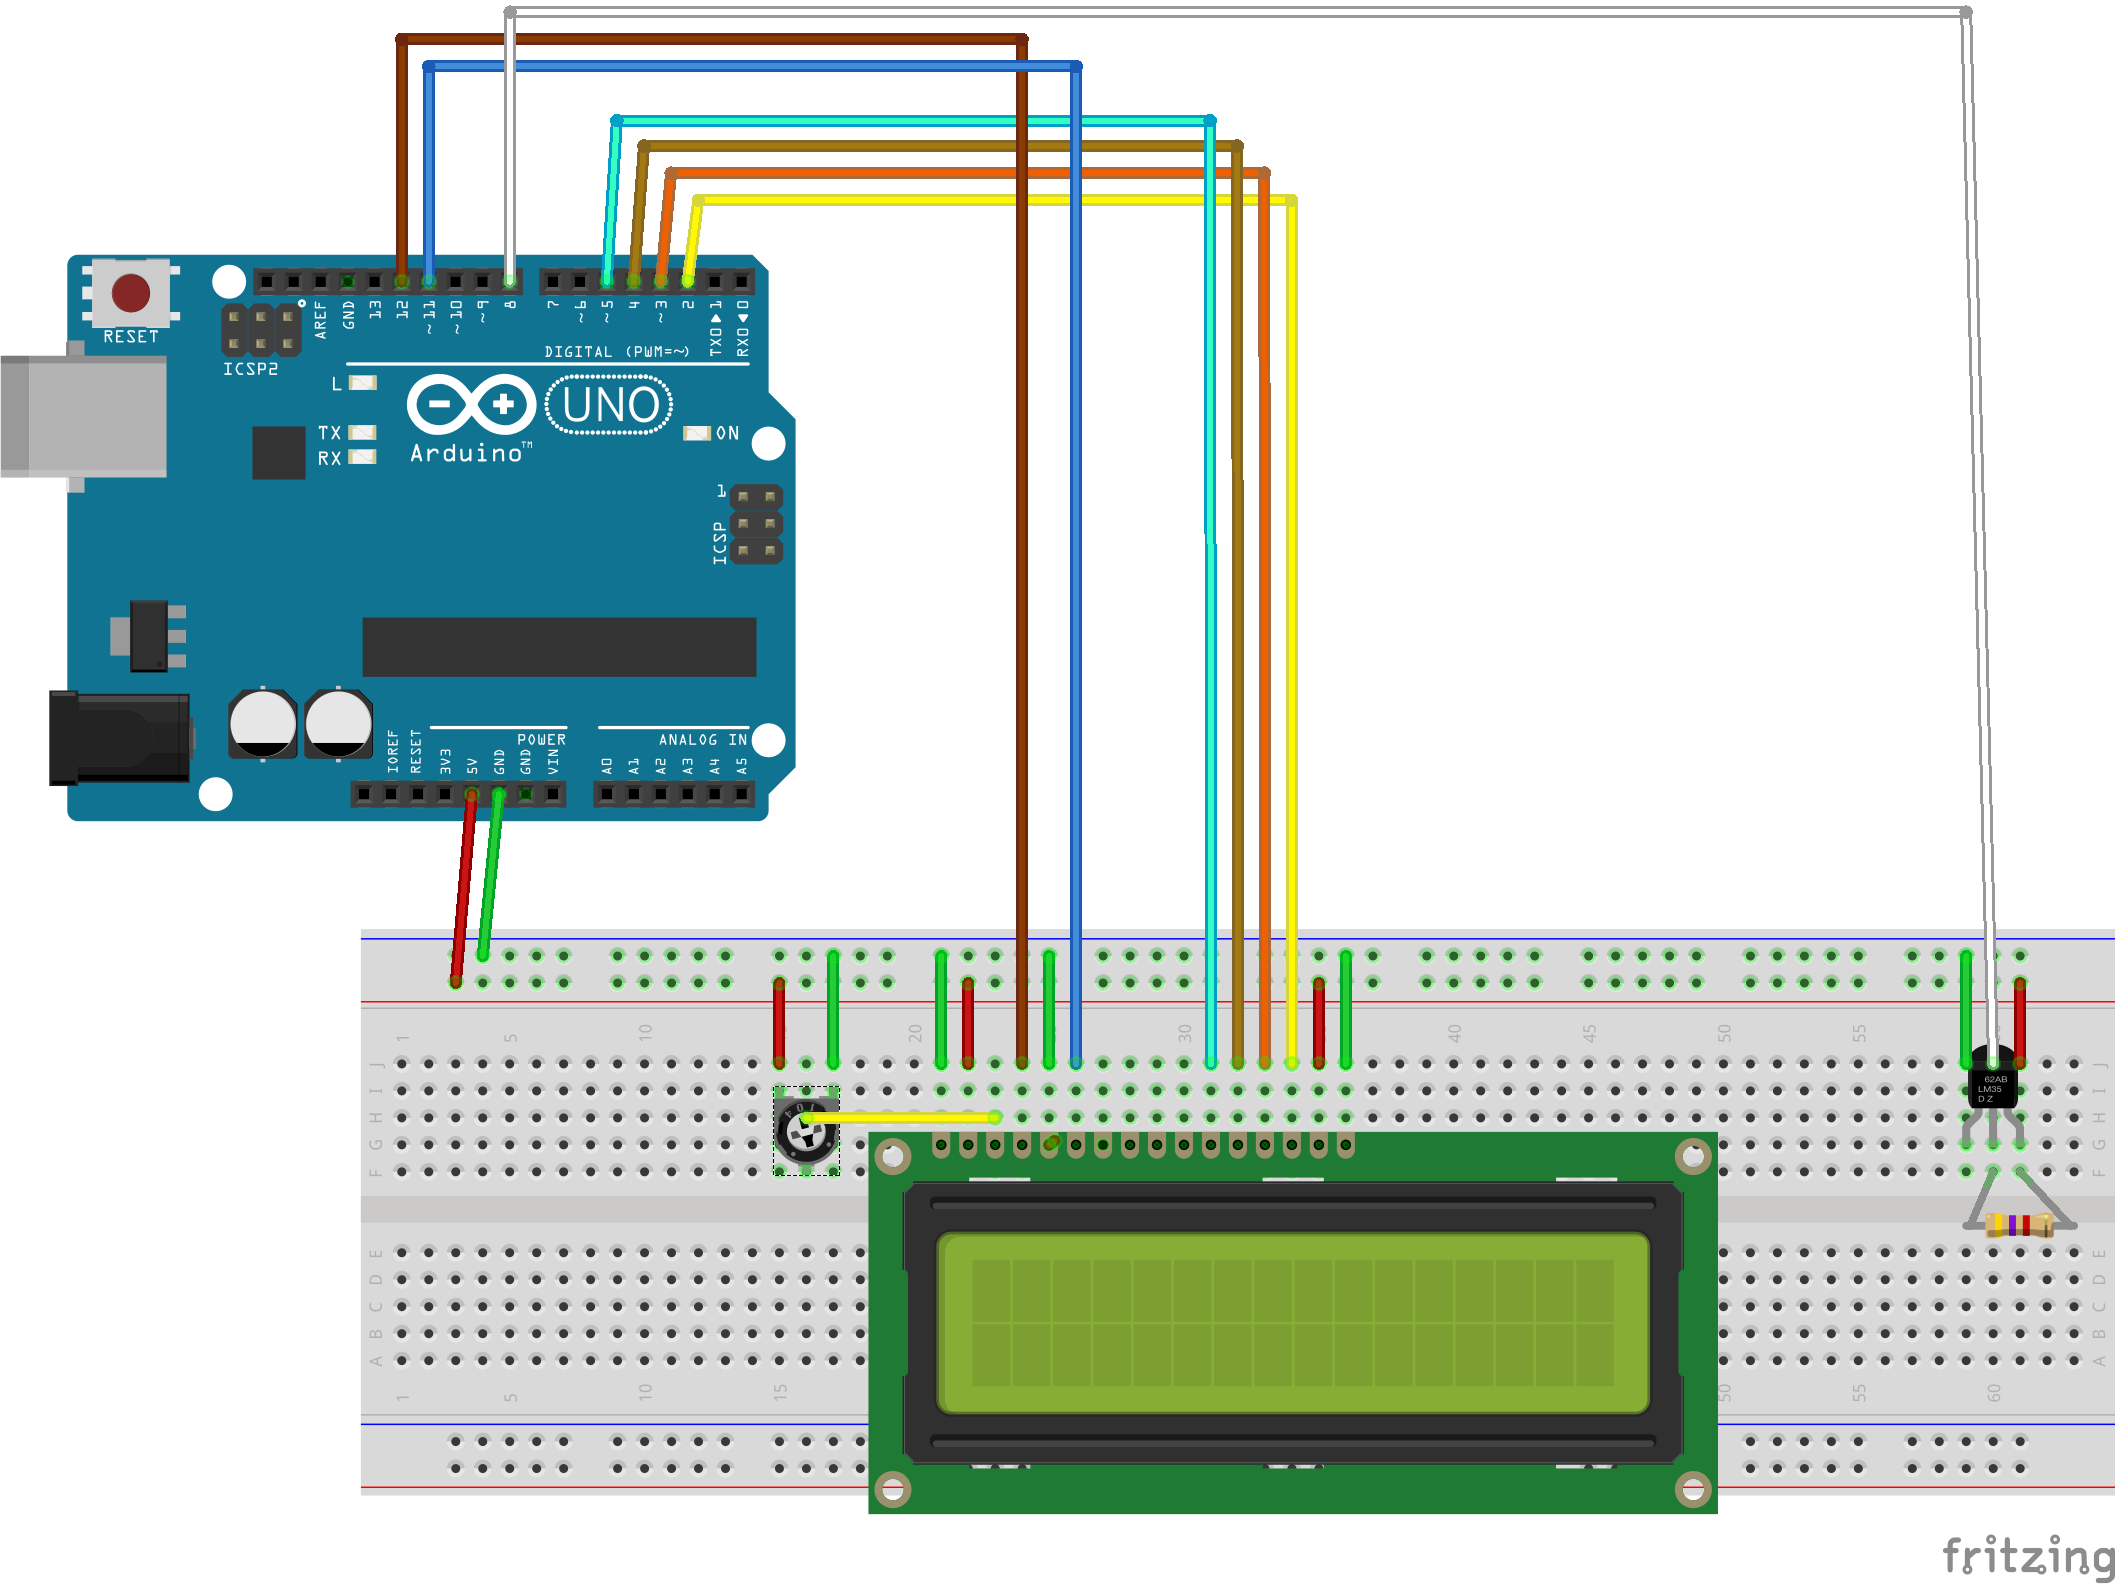
- Arduino ONO or Copy
- Generic 1602 16x2 Character LCD
- Male header pins for breadboards
- Series Potentiometer 100k
- 1-Wire Digital Thermometer Dallas DS1820
- Prototype PCB Board Kit
- Breadboard Jumper Wires Ribbon Cables Kit
Librarys
As most of the work is done by the librarys that we will #include in the sketch, you may need to install some of them into your ARDUINO IDE.
Librarys Required:-
- LiquidCrystal.h Already included.
- OneWire.h You will have to get this yourself from github
- DallasTemperature.h You will have to get this yourself from github
How to add Librarys
Download the .zip file from the github links above then follow this video to add them to your ARDUINO IDE.
The Sketch
/*
 * HADARS_Greenhouse_Thermometer.ino
 *
 * Copyright 2018  <Chris Duckles aka G6KIA>
 *
 * This program is free software; you can redistribute it and/or modify
 * it under the terms of the GNU General Public License as published by
 * the Free Software Foundation; either version 2 of the License, or
 * (at your option) any later version.
 *
 * This program is distributed in the hope that it will be useful,
 * but WITHOUT ANY WARRANTY; without even the implied warranty of
 * MERCHANTABILITY or FITNESS FOR A PARTICULAR PURPOSE.  See the
 * GNU General Public License for more details.
 *
 * You should have received a copy of the GNU General Public License
 * along with this program; if not, write to the Free Software
 * Foundation, Inc., 51 Franklin Street, Fifth Floor, Boston,
 * MA 02110-1301, USA.
 *
 *
 */

#include <OneWire.h>
#include <DallasTemperature.h>
#include <LiquidCrystal.h>
///////////////////////////////////////////////
// select the pins used on the LCD panel      /
///////////////////////////////////////////////
//  LiquidCrystal lcd(RS, E, D4, D5, D6, D7) //
///////////////////////////////////////////////

// initialize the library with the numbers of the interface pins
LiquidCrystal lcd(12, 11, 5, 4, 3, 2);

// Data wire is plugged into pin 8 on the Arduino
#define ONE_WIRE_BUS 8

// Setup a oneWire instance to communicate with any OneWire devices
// (not just Maxim/Dallas temperature ICs)
OneWire oneWire(ONE_WIRE_BUS);

// Pass our oneWire reference to Dallas Temperature.
DallasTemperature sensors(&oneWire);

int pause = 5000;        // 5000 milliseconds equals 5 second delay between temperature readings
float tempC = 0;         // Floating decimal point variable to store temperature reading
int tempCH = -1000;      // Integer variable to store Highest temperature reading. No decimal point.
int tempCL = 1000;       // Integer variable to store Lowest temperature reading. No decimal point.


void setup() {            // the setup function runs once when you press reset or power the board.

  Serial.begin(9600);     // Sets the data rate in bits per second (baud) for serial data transmission.
                          // And starts communicating with the computer and on pin A0 RX and A1 TX.

  lcd.begin(16, 2);       // Starts the LCD display and set up display size 2 lines of 16 charictors.

  lcd.clear();                // Clear the display and set cursor to top left position.
  lcd.print("    HADARS");    // Print TXT to top line of display.
  lcd.setCursor(0,1);         // Move cursor to left position on the second line.
  lcd.print("  Thermometer"); // Print TXT to top line of display.
                // Remember computer 0 is always the first position so top line = 0 Bottom = 1.

  sensors.begin();    // Start up the DS18b20 library

  delay(9000);        // wait 9 seconds so that users can read the display
}


void loop() {  // This is the main code, it run around the loop repeatedly:

  sensors.requestTemperatures();        // Send the command to get temperature
  tempC = sensors.getTempCByIndex(0);   // copy the current temperature into the Floating decimal point variable.
  Serial.println(tempC);                // print variable content to computer screen

  if (tempCL > tempC) tempCL = tempC ;  // Test if the current temperature (tempC) colder than the coldest temperature
                                        // recorded in tempCL. If it is a new low store the new low in tempCL.

  if (tempCH < tempC) tempCH = tempC ;  // Test if the current temperature (tempC) hotter than the hottest temperature
                                        // recorded in tempCH. If it is a new High store the new High in tempCH.

  lcd.clear();              // Clear the display.
  lcd.setCursor(0,0);       // Set cursor to top left position.
  lcd.print("Hi");          // Print Hi on the top left of the display.
  lcd.setCursor(14,0);      // Move the cursor position top line second right position.
  lcd.print("Lo");          // Print Lo on the top right of the display.
  lcd.setCursor(5,0);       // Move the cursor to the left of centre of the top line.
  lcd.print(tempC);         // Print the current temperature to 2 decimal places.

  lcd.setCursor(0,1);       // Set cursor to bottom left position.
  lcd.print(tempCH);        // Print the hottest temperature recorded.
  lcd.write(223);           // Print the degree symbol.
  lcd.write("C");           // followed by a C.
  lcd.setCursor(12,1);      // Set cursor to position bottom 12
  lcd.print(tempCL);        // Print the coldest temperature recorded.
  lcd.write(223);           // Print the degree symbol.
  lcd.write("C");           // followed by a C.

  delay(pause); // pause a few seconds as defined above between measurements.
            // if we don't pause the display will flicker and the DS18b20 wont have time to take an accurate reading.

/*
    The code below is the same as above except that I have swapped the top and bottom line over so as to create some
    animation on the LCD to show that the system hasn't frozen or crashed.
*/

  sensors.requestTemperatures();
  tempC = sensors.getTempCByIndex(0);

  if (tempCL > tempC) tempCL = tempC ;
  if (tempCH < tempC) tempCH = tempC ;
  lcd.clear();
  lcd.setCursor(0,1);
  lcd.print("Hi");
  lcd.setCursor(14,1);
  lcd.print("Lo");
  lcd.setCursor(5,1);
  lcd.print(tempC);

  lcd.setCursor(0,0);
  lcd.print(tempCH);
  lcd.write(223);
  lcd.write("C");
  lcd.setCursor(12,0);
  lcd.print(tempCL);
  lcd.write(223);
  lcd.write("C");
  delay(pause);
}
